Twilio is a company that "provides programmable communication tools for making and receiving phone calls, sending and receiving text messages, and performing other communication functions using its web service APIs." Some notable customers are Allergan, Lyft, and Doordash, just to name a few.
Today, I want to walk through how we can use Node.js and Twilio to send a text message to any phone number we want. We'll imagine we're a software developer that needs to send a verification code to a user because we've detected a "strange login" to our app.
TIP: if you don't want to read through the entire blog post, I've attached the full
index.jscode at the bottom
Setting Up Your Environment
To get started, let's make sure you have Node.js installed on your computer. If you're not sure, run this command in your terminal or command line.
node -v
And you should get a return of something similar to this.
v16.13.0
If you don't have Node.js, go to nodejs.dev and download it. I'd recommend getting the LTS (long-term support) since it's usually more stable.
To start the environment, make a folder and navigate to that folder. Once you've navigated to that directory in your terminal, go ahead and run this command in the terminal.
npm init
After it loads everything, you should a node_modules folder and a package.json. You also want to ceate a new file called index.js that we will use later. While you're at it, add a .env file too. It should all look like this.
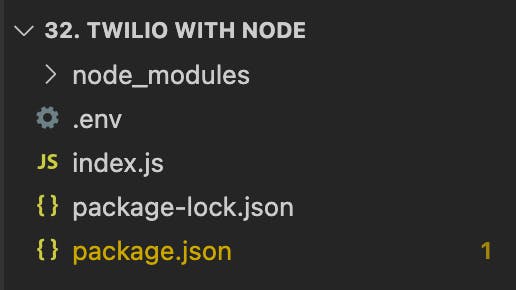
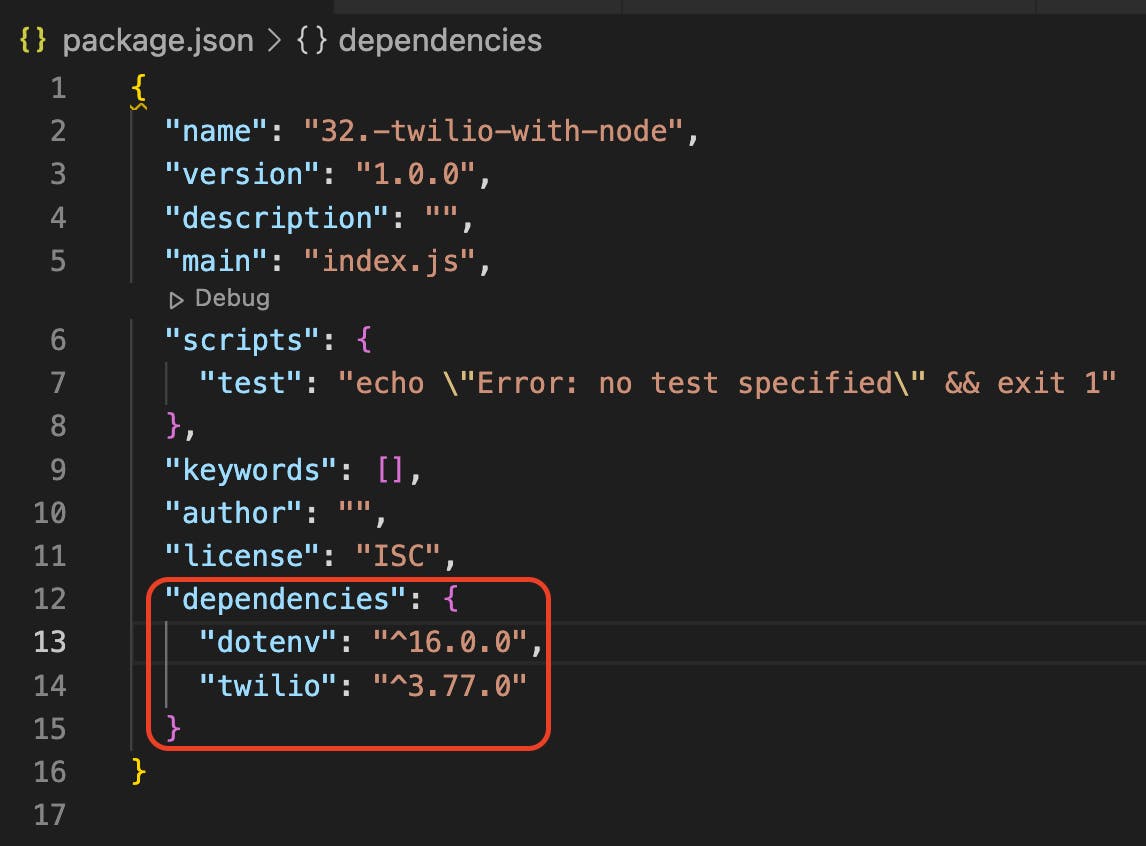
Alright, now we're ready to get going. Go back to the terminal and run npm install twilio --save and also run npm install dotenv --save. Be sure you're running these commands inside your twilio with node folder. These are the node packages that we'll be using to send the text messages and hiding our secret codes/authorization tokens. The extra --save alerts node to save them as dependencies in your package.json file. It should look something like this.
Alright, so the environment should be set up now. Let's move onto the JS file.
Writing the index.js file
FYI: We're going to write the code for the
index.jsfirst, and then head over to Twilio to signup and get our authorization codes.
Just to check whether or not you have node working properly, type this into your index.js file.
console.log("I'm excited for Twilio and Node.js to send texts!")
Jump back to the terminal, and run the command node index.js. Again, make sure you're inside that twilio with node folder. You should get your console.log message! Good? Great!
Okay, enough playing around. Let's get serious. Dive into that index.js file and add the following code.
const twilio = require("twilio");
const dotenv = require("dotenv");

// begin the dotenv environment
dotenv.config();

// pull in your info with dotenv
const client = twilio(
  process.env.TWILIO_ACCOUNT_SID,
  process.env.TWILIO_AUTH_TOKEN
);
As you can probably guess, we are bringing in the twilio and dotenv modules. Then we're pulling in the client info from the .env file we've created. However, if you try to run the code now, it will throw an error because we don't have that .env information yet.
What this code is doing is processing the "secret" env file and then assigning it to a client variable. The twilio module is working under the hood to help us out a lot. Then we can use that variable to setup our sending function. So, let's set that up. We'll need to identify from, to, and body. It'll look like this.
// Set up the message sending service
function sendSMS(from, to, body) {
  client.messages
    .create({
      from,
      to,
      body })
    .catch((error) => {
      console.error(error);
    });
}
We made this function and called it sendSMS. We'll pass in a phone number (from), another phone number (to), and a message (body). We used our client variable (the secret tokens) to create a message, and send it. Of course, if it doesn't work we'll add a catch to log the error.
Okay, let's take a break from this index.js file and head over to Twilio to set up an account.
Setting up a Twilio Account
We'll have to signup with Twilio so that they can provide us with a TWILIO_ACCOUNT_SID, a TWILIO_AUTH_TOKEN and we'll also receive a TWILIO_PHONE_NUMBER.
Signup for Twilio here. You'll get a free trial!
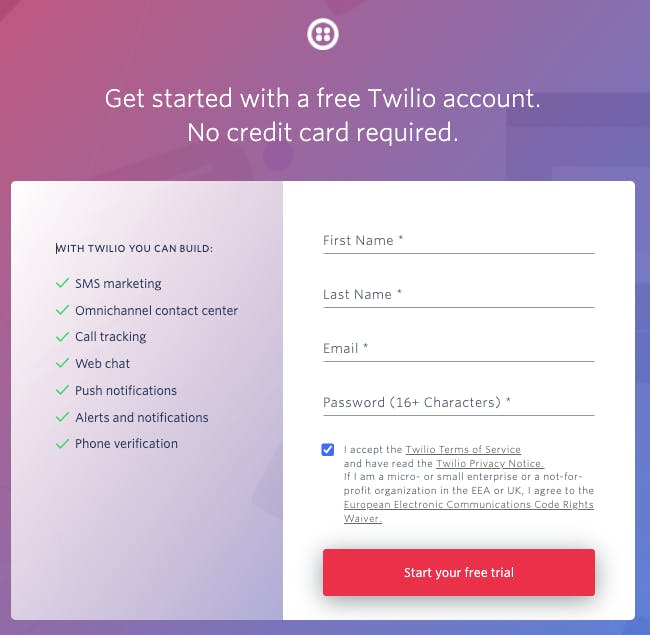
Once you register, find your account info and track down your Account SID, AUTH Token, and your Twilio Phone Number. Mine was at the bottom of the first page. It should look like this.
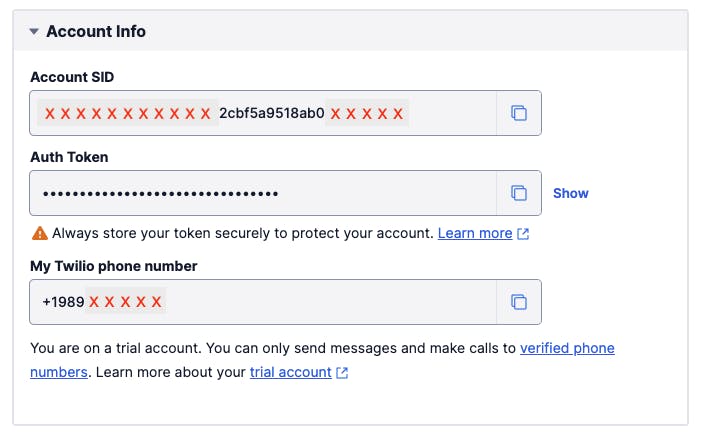
Copy all your information and add it into your .env like this. Obviously, there won't be so many x's. Don't share your info. Careful with the phone numbers. Depending on where you live, you'll have to enter different international dialing codes. For my Chinese phone number, I had to add +86.
TWILIO_ACCOUNT_SID=`xxxxxxx2cbf5a9518ab0xxxxx`
TWILIO_AUTH_TOKEN=`xxxe7d184baf09dxxxxxx`
TWILIO_PHONE_NUMBER=`+1989xxxxxxx`

// my 🇨🇳 number for testing
TO_PHONE_NUMBER=`+8613xxxxxxxxx`
And now you're ready to send a message!
Send that Message!
Now, let's finish the JS code here so we can actually send a message.
The following function is calling the sendSMS function we wrote before. It's processing the phone numbers, and then we can add any kind of message that we want. I've included Jenny's temporary code.
// send a message with Twilio and Node.js
sendSMS(
  process.env.TWILIO_PHONE_NUMBER,
  process.env.TO_PHONE_NUMBER,
  `We've detected a strange login, your TEMPORARY code is: 8675309`
);
This should also be pretty straightforward. We're using our Twilio phone number to send a message to another number. And that's it! We can now send messages with Twilio!
FULL index.js file
// ===== index.js file ======
const twilio = require("twilio");
const dotenv = require('dotenv')

// pull in your info with dotenv
dotenv.config();
const client = twilio(
  process.env.TWILIO_ACCOUNT_SID,
  process.env.TWILIO_AUTH_TOKEN
);

// Set up the message sending service
function sendSMS(from, to, body) {
  client.messages
    .create({
      from,
      to,
      body })
    .catch((error) => {
      console.error(error);
    });
}

// send a message with Twilio and Node.js
sendSMS(
  process.env.TWILIO_PHONE_NUMBER,
  process.env.TO_PHONE_NUMBER,
  `We've detected a strange login, your TEMPORARY code is: 8675309`
);
// ===== .env file ======
TWILIO_ACCOUNT_SID=`xxxxxxx2cbf5a9518ab0xxxxx`
TWILIO_AUTH_TOKEN=`xxxe7d184baf09dxxxxxx`
TWILIO_PHONE_NUMBER=`+1989xxxxxxx`

// my 🇨🇳 number for testing
TO_PHONE_NUMBER=`+8613xxxxxxxxx`
In a few seconds, your message should be sent to your phone number!
I hope you enjoyed this tutorial.
If you liked this article please follow me on Hashnode for the latest articles I publish every week. I'm tweeting my journey on Twitter daily, this way to my LinkedIn, finally you can see my codebase on GitHub
Thanks!

